War of Pixels HTML5 Game Development
by Ethan Alexander Shulman (March 20, 2025)
I've started working on a very simple 2D RTS game in Javascript called War of Pixels. I've never tried to design an RTS game and thinking about the design I wonder if I can make a decent game with just one unit type. RTS design seems incredibly complicated to me, the more classes/unit types you add and the complexity just snowballs. RTS games are essentially simulations with each unit being a particle/point of simulation so I think you need to be extremely aware of emergent behaviour. But that is incredibly hard to manage since emergent behaviour can take thousands of hours to realize and discover. I think even with just one unit type I will have a lot of work figuring out the controls, maps and AI.
To go over the basic design, in the game you will control units called 'Pixels' and move them around a map of points. Some points when you capture them will earn you more pixels, sending your pixels into enemy pixels will destroy each other. This essentially makes it a zero-sum game where if you have more pixels you will win the battle but lose pixels in the process. Being a singleplayer game I think the fun of the game will depend on the AI you fight against, so I plan to spend most of the time testing different AI.
Article Sections:
Rendering and Simulating
Map Points
Enemy Artificial Intelligence
The Game
Rendering and Simulating
To start I have a WebGL 1 wrapper and 2D sprite rendering system that I've already programmed from previous games. Here you can download the source files GL.js and Rendering.js.
GL.js is the WebGL 1 wrapper and has Javascript classes matching to WebGL objects as well as some helper functions. Mesh = vertex/index buffer, Shader = shader program and uniforms, RenderTexture = framebuffer object and texture.
Rendering.js has camera variables/functions and a 2D batched sprite rendering system. The SpriteBatch class is used to generate a mesh of quads for rendering sprites. You call SpriteBatch.Update and pass an array of Sprite's and it updates the mesh. The Sprite class is only a 2D transform, all the sprites in a batch use the same texture/coloring/uniforms.
Here I've created some initial shaders to render pixel/point sprites, the quicker we get objects rendered the sooner we can start testing. The point shader draws a circle and the pixel shader draws a box. Save the code to the file Shaders.glsl.< script type= "text/plain" id= "SpriteVert.glsl" >
//sprite vertex shader
attribute vec4 vPos;
varying vec2 uv;
uniform vec4 camera; //xy = camera position, zw = 1/(aspect*zoom)
void main( ) {
uv = vPos. zw;
gl_Position = vec4 ( ( vPos. xy- camera. xy) * camera. zw, 0, 1) ;
}
< / script>
< script type= "text/plain" id= "Point.glsl" >
//point shader
varying vec2 uv;
void main( ) {
gl_FragColor = vec4 ( max ( 0. , 1. - length ( uv) ) ) ;
}
< / script>
< script type= "text/plain" id= "Pixel.glsl" >
//pixel shader
varying vec2 uv;
uniform vec4 color;
void main( ) {
vec2 p = abs ( uv) ;
float av = max ( p. x, p. y) ;
gl_FragColor = color* ( av < . 5 ? 1. : 0. ) ;
}
< / script>
I like to put shader code in HTML text elements that way we can easily load the shader code even when opening the HTML file locally. Load the shaders in the InitializeRendering function we will use them later, add a global variable for pixelShader and pointShader.//inside InitializeRendering()...
var svert = LoadShader( "SpriteVert.glsl" , gl. VERTEX_SHADER) ,
pointFrag = LoadShader( "Point.glsl" , gl. FRAGMENT_SHADER) ,
pixelFrag = LoadShader( "Pixel.glsl" , gl. FRAGMENT_SHADER) ;
pointShader = new Shader( svert, pointFrag, SPRITE_ATTRIBS) ;
pixelShader = new Shader( svert, pixelFrag, SPRITE_ATTRIBS) ;
gl. deleteShader( svert) ;
gl. deleteShader( pointFrag) ;
gl. deleteShader( pixelFrag) ;
Thinking about how I would like the Pixel mechanics to work I need to detect when they collide to damage each other. If I'm doing collision detection for this anyways I feel like I might as well do a basic physics system to handle most of the pixels mechanics. The pixels will be split into different colored factions which each destroy each other when they touch. To efficiently calculate collisions I'm going to sort the pixels into 2D grid cells and only check collisions with pixels in nearby cells. The physics will be incredibly simple the pixels will just be primitive circles that repel each other when intersecting. Despite being so simple it was still a good chunk of code, download it here Pixels.js.
If you notice the Pixel class inherits from the Sprite class, so we can just pass the array of pixels to update the SpriteBatch. We're going to create a Render() function that clears the screen and renders our pixels. To render the pixels we need to update the sprite batch mesh, bind the pixel shader, set the uniforms and draw the mesh. Add the code below to Rendering.js.function Render( ) {
var camSX = 1/ ( aspectX* cameraZoom) ,
camSY = 1/ ( aspectY* cameraZoom) ;
display. Bind( ) ;
gl. clearColor( 0, 0, 0, 1) ;
gl. clear( gl. COLOR_BUFFER_BIT) ;
pixelShader. Bind( ) ;
gl. uniform4f( pixelShader[ "camera" ] , cameraX, cameraY, camSX, camSY) ;
for ( var fi = 0; fi < activeFactions. length; fi+ + ) {
var pxFaction = activeFactions[ fi] ;
gl. uniform4f( pixelShader[ "color" ] , pxFaction. red, pxFaction. green, pxFaction. blue, 1) ;
pxFaction. pixelsBatch. Update( pxFaction. pixels, false ) ;
pxFaction. pixelsBatch. Render( ) ;
}
}
To bring all the code together we need to initialize the different systems and make the main loop. Add a DOMContentLoaded event listener to listen for the page load and inside call our different initialization functions, InitializeGraphics(), etc. We're also going to create 2 pixel factions and spawn some pixels to test the pixel simulation. To run our main loop the requestAnimationFrame function will execute our loop at the monitors refresh rate. But for the game logic and physics I would like to use a fixed update rate to keep it deterministic. To do that we will manually track the tick time and only update after it passes the tick time threshold. Save the code below as App.js.var currentTime, deltaTime, tickTimer = 0;
TICK_RATE = 10, TICK_STEP = 1/ TICK_RATE;
//DOM loaded, program entry point
document. addEventListener( "DOMContentLoaded" , function ( ) {
//initialize systems
if ( ! InitializeGraphics( ) ) return ;
InitializeRendering( ) ;
InitializePixels( ) ;
//create factions and pixels
for ( var i = 0; i < 2; i+ + ) {
var fac = FACTIONS[ i] ;
for ( var p = 0; p < 100; p+ + ) {
var pX = ( Math. random( ) - 0. 5) * 20, pY = ( Math. random( ) - 0. 5) * 20;
fac. Spawn( pX+ cameraX+ ( i?15: - 15) , pY+ cameraY) ;
}
activeFactions. push( fac) ;
}
//start main loop
currentTime = Date. now( ) ;
MainLoop( ) ;
} ) ;
//main update and rendering loop
function MainLoop( ) {
var newTime = Date. now( ) ;
deltaTime = ( newTime- currentTime) / 1000;
currentTime = newTime;
//fixed tick rate for game logic/physics
tickTimer = Math. min( 1, tickTimer+ deltaTime) ;
while ( tickTimer > = TICK_STEP) {
UpdatePixels( ) ;
tickTimer - = TICK_STEP;
}
Render( ) ;
requestAnimationFrame( MainLoop) ;
}
I build all the different Javascript files into a single .html file using a .bat script, I've also included a .sh script for Linux. You will need these additional files to add the header, script tags and HTML wrapping, download this .zip it includes all the code files you need. Run build.bat and it will make Build.html, open Build.html and watch the first pixels spawn!
GL.js is the WebGL 1 wrapper and has Javascript classes matching to WebGL objects as well as some helper functions. Mesh = vertex/index buffer, Shader = shader program and uniforms, RenderTexture = framebuffer object and texture.
Rendering.js has camera variables/functions and a 2D batched sprite rendering system. The SpriteBatch class is used to generate a mesh of quads for rendering sprites. You call SpriteBatch.Update and pass an array of Sprite's and it updates the mesh. The Sprite class is only a 2D transform, all the sprites in a batch use the same texture/coloring/uniforms.
Here I've created some initial shaders to render pixel/point sprites, the quicker we get objects rendered the sooner we can start testing. The point shader draws a circle and the pixel shader draws a box. Save the code to the file Shaders.glsl.
I like to put shader code in HTML text elements that way we can easily load the shader code even when opening the HTML file locally. Load the shaders in the InitializeRendering function we will use them later, add a global variable for pixelShader and pointShader.
Thinking about how I would like the Pixel mechanics to work I need to detect when they collide to damage each other. If I'm doing collision detection for this anyways I feel like I might as well do a basic physics system to handle most of the pixels mechanics. The pixels will be split into different colored factions which each destroy each other when they touch. To efficiently calculate collisions I'm going to sort the pixels into 2D grid cells and only check collisions with pixels in nearby cells. The physics will be incredibly simple the pixels will just be primitive circles that repel each other when intersecting. Despite being so simple it was still a good chunk of code, download it here Pixels.js.
If you notice the Pixel class inherits from the Sprite class, so we can just pass the array of pixels to update the SpriteBatch. We're going to create a Render() function that clears the screen and renders our pixels. To render the pixels we need to update the sprite batch mesh, bind the pixel shader, set the uniforms and draw the mesh. Add the code below to Rendering.js.
To bring all the code together we need to initialize the different systems and make the main loop. Add a DOMContentLoaded event listener to listen for the page load and inside call our different initialization functions, InitializeGraphics(), etc. We're also going to create 2 pixel factions and spawn some pixels to test the pixel simulation. To run our main loop the requestAnimationFrame function will execute our loop at the monitors refresh rate. But for the game logic and physics I would like to use a fixed update rate to keep it deterministic. To do that we will manually track the tick time and only update after it passes the tick time threshold. Save the code below as App.js.
I build all the different Javascript files into a single .html file using a .bat script, I've also included a .sh script for Linux. You will need these additional files to add the header, script tags and HTML wrapping, download this .zip it includes all the code files you need. Run build.bat and it will make Build.html, open Build.html and watch the first pixels spawn!
| You can see the pixels spawn in condensed and expand outward due to the physics collisions repelling each other. As the different factions red and yellow touch each other they disappear from damaging each other and dying. |
Map Points
I have an idea of what I want the map to look like, a network of points connected by line paths. The pixels will only be able to travel along the paths so you can't just freely go straight across the map. First I'll program the map point and path classes, also I added a simple grid generation to test it out. Save this code to Map.js and add it to the build script.
var mapPoints = [ ] , batchPoints = [ ] , mapPaths = [ ] ,
mapPointsBatch, mapPathsBatch;
function InitializeMap( ) {
mapPointsBatch = new SpriteBatch( ) ;
mapPathsBatch = new SpriteBatch( ) ;
mapPathsBatch. lines = true ;
}
/**@constructor
@extends {Sprite}*/
function MapPoint( x, y) {
Sprite. call( this ) ;
this . x = x;
this . y = y;
this . pointId = mapPoints. length;
this . paths = [ ] ;
this . connections = [ ] ;
}
MapPoint. prototype = Object. create( Sprite. prototype ) ;
/**@constructor
@extends {Sprite}*/
function MapPath( p1, p2) {
Sprite. call( this ) ;
this . pointA = p1;
this . pointB = p2;
this . x = ( p1. x+ p2. x) * 0. 5;
this . y = ( p1. y+ p2. y) * 0. 5;
var dx = p2. x- p1. x, dy = p2. y- p1. y;
this . scaleX = 5;
this . distance = Math. sqrt( dx* dx+ dy* dy) ;
this . scaleY = this . distance* 0. 5;
this . angle = Math. atan2( dx, dy) ;
this . directionX = dx/ this . distance;
this . directionY = dy/ this . distance;
p1. paths. push( this ) ;
p1. connections. push( p2) ;
p2. paths. push( this ) ;
p2. connections. push( p1) ;
}
MapPath. prototype = Object. create( Sprite. prototype ) ;
//clear map
function ClearMap( ) {
mapPaths. length = 0;
mapPathsBatch. renderCount = 0;
mapPoints. length = 0;
mapPointsBatch. renderCount = 0;
batchPoints. length = 0;
}
//generate 4x4 grid map
function GenerateGridMap( ) {
//points
for ( var y = 0; y < 4; y+ + ) {
var yl = Math. abs( y- 1. 5) ;
for ( var x = 0; x < 4; x+ + ) {
var xl = Math. abs( x- 1. 5) ,
pt = new MapPoint( ox- 192+ x* 128,
oy- 192+ y* 128) ;
mapPoints. push( pt) ;
}
}
//paths
for ( var y = 0; y < 4; y+ + ) {
for ( var x = 0; x < 4; x+ + ) {
var id = x+ y* 4;
if ( x < 3) mapPaths. push( new MapPath( mapPoints[ id] , mapPoints[ id+ 1] ) ) ;
if ( y < 3) mapPaths. push( new MapPath( mapPoints[ id] , mapPoints[ id+ 4] ) ) ;
}
}
return section;
}
To draw our new map paths and points we need a path line shader, I've made a simple glowing line shader. Add the shader code below to Shaders.glsl and load the shader in InitializeRendering.< script type= "text/plain" id= "Path.glsl" >
//map path line shader
varying vec2 uv;
void main( ) {
vec2 p = abs ( uv) ;
p. x = max ( 0. , p. x- . 1) ;
gl_FragColor = vec4 ( . 35* max ( 0. , 1. - p. x* ( 1. / . 9) - clamp ( ( p. y- . 9) * 10. , 0. , 1. ) ) / ( 1. + p. x* 2. 5) ) ;
}
< / script>
Testing out by calling GenerateGrid, updating the map paths batch and drawing it with the path line shader we can see a basic grid. Adding some random jitters to the points gives us some varying distances between the grid points. Not bad for starting out as a test ground map.

With these map points I now want the pixels to stay at a point, so I've added a orbitPoint variable to the Pixel class. And in the UpdatePixels function I calculate the direction to the orbit point and add it to the movement vector.
Now to let the pixels travel between the points along the paths I will add a travelPoint variable that works similarly to orbitPoint. The complicated thing is I want you to be able to select any point to move to, and have it automatically calculate the shortest path. Because of this I need path finding, the nice thing is I've already sorted my map into points and their connecting paths. I can take the distance of each path and combine them to build the distance along a set of paths and then store the shortest routes. Because we won't have a ton of points we can just store a lookup table with an entry for each pair of points. I've added variables to the Pixel class, findPath will be our LUT, pfSkip and pfLengths are used for path generation. The generate path finding function below loops through all the points adding up their hop distance, the path from one point to another is the one with the shortest total distance. The loop repeats until no more shortest distances are found, this is at maximum numPoints-1 iterations. Save the code below as PathFinding.js and add it to the build script.
//generate path finding lut's for map points
function GeneratePathFinding( ) {
var numPts = mapPoints. length;
for ( var i = 0; i < numPts; i+ + ) {
//allocate luts
var pt = mapPoints[ i] ,
find = new Array( numPts) ,
lens = new Array( numPts) ,
skip = new Array( numPts) ;
lens. fill( 1e16) ;
skip. fill( false ) ;
pt. findPath = find;
pt. pfLengths = lens;
pt. pfSkip = skip;
//init neighbour paths
var local = pt. paths,
nebors = pt. connections,
nLocal = local. length;
for ( var l = 0; l < nLocal; l+ + ) {
var pid = nebors[ l] . pointId;
skip[ pid] = true ;
find[ pid] = l;
lens[ pid] = local[ l] . distance;
}
}
//connect shortest paths until we don't find anymore
var numPtsM1 = numPts- 1,
foundNew = true ;
while ( foundNew) {
foundNew = false ;
for ( var i = 0; i < numPtsM1; i+ + ) {
var pt = mapPoints[ i] ,
nebors = pt. connections,
nLocal = nebors. length,
find = pt. findPath,
lens = pt. pfLengths,
skip = pt. pfSkip;
for ( var c = i+ 1; c < numPts; c+ + ) {
if ( skip[ c] ) continue ; //skip neighbours
var minLen = 1e16, minL = 0;
for ( var l = 0; l < nLocal; l+ + ) {
var nb = nebors[ l] ,
len = nb. pfLengths[ c] ;
if ( len > = 1e16) continue ; //no path to connection, skip
len + = lens[ nb. pointId] ;
if ( len < minLen) {
minLen = len;
minL = l;
}
}
if ( minLen < 1e16 & & minLen < lens[ c] ) {
var cPt = mapPoints[ c] ;
lens[ c] = minLen;
cPt. pfLengths[ i] = minLen;
find[ c] = minL;
cPt. findPath[ i] = cPt. findPath[ nebors[ minL] . pointId] ;
foundNew = true ;
}
}
}
}
//free unused arrays and set self path lengths to 0
for ( var i = 0; i < numPts; i+ + ) {
var pt = mapPoints[ i] ;
pt. pfLengths[ i] = 0;
pt. pfSkip = null;
}
}
In the pixel class I added travelTarget and travelPoint, when you set travelTarget it uses the findPath array to get the next point on the route and stores that in travelPoint. When travelPoint is set the pixel travels towards the travel point until it has travelled the path distance.
To send pixels travelling I want to be able to select specific groups of pixels, this means we need to add input controls to the game. Add mousedown, mouseup, mousemove and wheel event listeners so we have full mouse controls. We will use these to move/zoom the camera, select pixels and send them to points. Using the ScreenToWorld functions we can easily convert mouse positions to world positions of our selection box, it will handle any camera positioning and zooming. Then make a SelectPixelsWithinBox function which gives us an array of pixels within a box. To move we get the array of pixels within the box and set their travel targets to the point nearest to the click. You can download the input handling code here Input.js and add it to the build script.
The selected pixels are then rendered using a separate SpriteBatch with a lighter color, the selection box and point is a quad mesh drawn with another shader. Below you can see selecting the pixels within a box and moving them to the clicked point.
The next key mechanic is the source of new pixels, we're going to call some of the points 'Mines' and have them spawn new pixels when they are captured/filled. Mines will have different sizes where some take more pixels to fill but spawn faster in exchange. We will add a mineSize variable to the MapPoint class, when the value is >0 the point is a mine. To check if a mine is full we need to keep track of the pixels at each point, so we will add a factionCount Array variable to the MapPoint class. When pixels complete travelling to a point we increment the faction count, when they leave a point we decrement it. In the update loop we will check all the mines to keep track if they are full and add deltaTime to each mines spawn timer. If a mine is full and its spawn timer counts down we spawn a pixel at the mine. Finally I made a shader for the mines, and a separate sprite batch which is built from the map mines array. I've also added rendering for the points, below you can see new pixels spawning from a full mine.
To draw our new map paths and points we need a path line shader, I've made a simple glowing line shader. Add the shader code below to Shaders.glsl and load the shader in InitializeRendering.
Testing out by calling GenerateGrid, updating the map paths batch and drawing it with the path line shader we can see a basic grid. Adding some random jitters to the points gives us some varying distances between the grid points. Not bad for starting out as a test ground map.
With these map points I now want the pixels to stay at a point, so I've added a orbitPoint variable to the Pixel class. And in the UpdatePixels function I calculate the direction to the orbit point and add it to the movement vector.
|
|
The pixels now form a blob around the point they orbit. |
In the pixel class I added travelTarget and travelPoint, when you set travelTarget it uses the findPath array to get the next point on the route and stores that in travelPoint. When travelPoint is set the pixel travels towards the travel point until it has travelled the path distance.
To send pixels travelling I want to be able to select specific groups of pixels, this means we need to add input controls to the game. Add mousedown, mouseup, mousemove and wheel event listeners so we have full mouse controls. We will use these to move/zoom the camera, select pixels and send them to points. Using the ScreenToWorld functions we can easily convert mouse positions to world positions of our selection box, it will handle any camera positioning and zooming. Then make a SelectPixelsWithinBox function which gives us an array of pixels within a box. To move we get the array of pixels within the box and set their travel targets to the point nearest to the click. You can download the input handling code here Input.js and add it to the build script.
The selected pixels are then rendered using a separate SpriteBatch with a lighter color, the selection box and point is a quad mesh drawn with another shader. Below you can see selecting the pixels within a box and moving them to the clicked point.
The next key mechanic is the source of new pixels, we're going to call some of the points 'Mines' and have them spawn new pixels when they are captured/filled. Mines will have different sizes where some take more pixels to fill but spawn faster in exchange. We will add a mineSize variable to the MapPoint class, when the value is >0 the point is a mine. To check if a mine is full we need to keep track of the pixels at each point, so we will add a factionCount Array variable to the MapPoint class. When pixels complete travelling to a point we increment the faction count, when they leave a point we decrement it. In the update loop we will check all the mines to keep track if they are full and add deltaTime to each mines spawn timer. If a mine is full and its spawn timer counts down we spawn a pixel at the mine. Finally I made a shader for the mines, and a separate sprite batch which is built from the map mines array. I've also added rendering for the points, below you can see new pixels spawning from a full mine.
Enemy Artificial Intelligence
The game is fairly fleshed out now, you can select and move pixels, capture mines, gain new pixels and send them to attack the enemy faction pixels. But the enemy faction pixels just sit there, we need AI to control the enemy pixels. The enemy AI is going to decide whether or not the game is a challenge at all or whether it is fun. A terrible AI while easy to beat gets boring fast, but a perfectly smart AI is also boring because it leaves no room to learn. My goal is to create a spectrum of different AI's to suite different skill levels and provide variety.
Beginning to think about how I want the actual AI programming to work, I'm going to run the AI processing in a web worker. This way it runs on a separate thread, I can run complex calculations for the AI and not worry about lagging the main rendering thread. This complicates it a bit however because now I need to transfer the required game state data to the WebWorker for the AI to make decisions. At initialization it will need map points/paths and the path finding routes, and at runtime each AI tick it will need to pass the faction count of pixels at each point. This way it can calculate which mines to go to, which ones are already full, which paths are shortest and which ways have enemies in the path. These are all the different variables the AI will need to make effective moves in the game.
I've implemented the core of the AI worker code and sorted out the messaging between the worker and main JS thread. You can download it here AIWorker.js, add it to the build script. Inside you can see I have the abstract AI class layed out, for each different AI I will have a different class which implements the Decide() function. I've also added a MovePixels function which sends a message to main thread with the movement action data. The essential part of the worker code is self.onmessage where we listen to messages from the main thread and run the appropriate functions. To test it out I have made a RngAI which moves pixels to a random neighbour.
Note the AIWorker code is wrapped in a plaintext script element, it doesn't do anything until we load it into a worker. Get the textContext from the plaintext DOM element then we load the worker using a object url to a blob of the text. Download AI.js for the code, add it to the build script. With our worker initialized we can listen to onmessage to receive messages from the worker and use them to execute functions on the main thread. We send the game map data in a message by packing everything we need into a JSON object, map points, paths, path finding routes and ai ID's. I've programmed an AIMovePixels function to execute the AI movements, it's fairly complex it searches the pixel map cells surrounding the source. It starts in the center of the source and expands outward finding pixels to move until it either meets the movement count or can't find anymore. And finally we have our UpdateAI function that runs every fixed update tick alongside UpdatePixels. We increment a timer for each AI and when it ticks we send the updated map state and a message telling the AI to execute the Decide function.
This abstract AI class system is really nice, I feel like I can quickly add new AI's now. The RngAI is probably the baseline of the worst AI you could make, no actual decision making at all just RNG. Thinking about the RNG though I would like it to follow the same random set of moves each game so I'm shifting from using Math.random() to my own PRNG function where I can control the seed for each AI. This way I can at least ensure the AI is somewhat deterministic. The next step from a completely random AI is to prioritize going to mines, since the main goal of the AI will be spreading from mine to mine to grow their army. I want to keep it random though so I will generate an array of probabilities, giving mines a 20:1 chance of being selected to move than plain points. You can see this next AI below, I've called it VoidGuard.
/**@constructor
@extends {AI}*/
function VoidGuard( pId, seed) {
AI. call( this , pId, seed) ;
}
VoidGuard. prototype = Object. create( AI. prototype ) ;
VoidGuard. prototype . Decide = function ( ) {
//find largest 'surplus' to choose movement from
var nPts = mapPoints. length,
facId = this . faction,
maxSurplus = 0, maxPt = null,
i;
for ( i = 0; i < nPts; i+ + ) {
var pt = mapPoints[ i] ,
count = pt. factionCount[ facId] - pt. mineSize;
if ( count > maxSurplus) {
maxSurplus = count;
maxPt = pt;
}
}
maxSurplus = Math. round( maxSurplus* 0. 5) ;
if ( maxSurplus > 1) {
//assign each possible movement(neighbour) a probability
var cons = maxPt. connections,
optLen = cons. length,
total = 0;
for ( i = 0; i < optLen; i+ + ) {
var cpt = mapPoints[ cons[ i] ] ,
fcount = cpt. factionCount[ facId] + cpt. travelCount[ facId] ,
prob = ( fcount < cpt. mineSize ? 20 : 1/ ( 1+ fcount) ) ;
abuf. push( prob) ;
total + = prob;
}
if ( total = = = 0) {
abuf. length = 0;
return ;
}
//randomly select movement option from probabilities
var rind = this . RandFloat( 0, total- 1e- 6) ,
t = 0;
for ( i = 0; i < optLen; i+ + ) {
var nxt = t+ abuf[ i] ;
if ( rind < nxt) break ;
t = nxt;
}
abuf. length = 0;
this . MovePixels( maxPt, mapPoints[ cons[ i] ] , maxSurplus) ;
}
}
VoidGuard already works surprisingly well it expands pretty quickly, so I made a modified version which doesn't just move to neighbours but any point on the map. It also sends all the pixels in one big wave when it has enough to fill the mine, I called this one VoidLord since it's pretty good but still very random. Spending some time playing around with it and it actually managed to beat me by sending all its pixels into mine right at the start. I've also added some different map generations to test out the AI's on.
I've been thinking about what the best AI would be, it would prioritize the nearest mines first and avoid running into enemy pixels unless necessary. It actually seems pretty simple, because it's a zero-sum battle if you can capture any mines without losing pixels that is always the best move. To start I can loop through all the points with pixels and find the distance to the closest empty mine. I can already tell from experimenting this is the way, the AI spreads across the map quick ignoring points and going straight from mine to mine. It's so simple but already works so well, I can tell it has a lot of issues though like it ignores enemy pixels. There's multiple things we need to account for when deciding to move to a mine, distance, mine size, number of enemies in the way. Thinking about it the mine size is like the size of the reward for the action, the number of enemes and distance are the cost in time. I can combine them all into a single value by calculating reward/cost, converting the number of enemies to a time cost doesn't seem to have a clear answer. I guess I can calculate the pixels produced each second across all mines, divide the number of enemies by that and you have the seconds to produce that many pixels. Combining them all into a single value tells us how much advantage is gained by each move, we just need to find the moves with the highest advantage and take them. You can download the finished AI code here ChronosAI.js, I've called it Chronos since it all seems to be about making the best use of your time.
(2 months later) I ended up creating 16 total AI's, 9 of them are neural networks. I know sorry for the skip I won't be explaining it all here there's just too much to cover. The neural networks are very small(<100 neurons, <10000 connections), the network is run for every point and generates a probability given input data like nearby enemies, size of mine and distance to the point. I trained the neural networks on some of the AI's I programmed, and I 'evolved' some of the networks by running battles against each other and training on the 'best'(highest/fastest pixel score). The neural networks honestly out performed my expectations, training a small 50 neuron network on Chronos I was able to nearly match it. In the end I have a spectrum of AI's ranging from incredibly easy(DoofusNN) to impossibly hard(Chronos).
Here is a Youtube video showing each AI's behaviour through a timelapse:
Beginning to think about how I want the actual AI programming to work, I'm going to run the AI processing in a web worker. This way it runs on a separate thread, I can run complex calculations for the AI and not worry about lagging the main rendering thread. This complicates it a bit however because now I need to transfer the required game state data to the WebWorker for the AI to make decisions. At initialization it will need map points/paths and the path finding routes, and at runtime each AI tick it will need to pass the faction count of pixels at each point. This way it can calculate which mines to go to, which ones are already full, which paths are shortest and which ways have enemies in the path. These are all the different variables the AI will need to make effective moves in the game.
I've implemented the core of the AI worker code and sorted out the messaging between the worker and main JS thread. You can download it here AIWorker.js, add it to the build script. Inside you can see I have the abstract AI class layed out, for each different AI I will have a different class which implements the Decide() function. I've also added a MovePixels function which sends a message to main thread with the movement action data. The essential part of the worker code is self.onmessage where we listen to messages from the main thread and run the appropriate functions. To test it out I have made a RngAI which moves pixels to a random neighbour.
Note the AIWorker code is wrapped in a plaintext script element, it doesn't do anything until we load it into a worker. Get the textContext from the plaintext DOM element then we load the worker using a object url to a blob of the text. Download AI.js for the code, add it to the build script. With our worker initialized we can listen to onmessage to receive messages from the worker and use them to execute functions on the main thread. We send the game map data in a message by packing everything we need into a JSON object, map points, paths, path finding routes and ai ID's. I've programmed an AIMovePixels function to execute the AI movements, it's fairly complex it searches the pixel map cells surrounding the source. It starts in the center of the source and expands outward finding pixels to move until it either meets the movement count or can't find anymore. And finally we have our UpdateAI function that runs every fixed update tick alongside UpdatePixels. We increment a timer for each AI and when it ticks we send the updated map state and a message telling the AI to execute the Decide function.
| To run it we call InitializeAI in DOMContentLoaded and after creating 2 factions we call LoadAI([[0,1]]). This loads in our RngAI and ticks every 1 second, and it will control the 2nd faction(id=1). Below you can see RngAI in action, it randomly spreads out from point to point. It's kind of creepy to watch the pixels moving on their own, for all the testing so far that yellow blob has just been growing in place. |  |
VoidGuard already works surprisingly well it expands pretty quickly, so I made a modified version which doesn't just move to neighbours but any point on the map. It also sends all the pixels in one big wave when it has enough to fill the mine, I called this one VoidLord since it's pretty good but still very random. Spending some time playing around with it and it actually managed to beat me by sending all its pixels into mine right at the start. I've also added some different map generations to test out the AI's on.
I've been thinking about what the best AI would be, it would prioritize the nearest mines first and avoid running into enemy pixels unless necessary. It actually seems pretty simple, because it's a zero-sum battle if you can capture any mines without losing pixels that is always the best move. To start I can loop through all the points with pixels and find the distance to the closest empty mine. I can already tell from experimenting this is the way, the AI spreads across the map quick ignoring points and going straight from mine to mine. It's so simple but already works so well, I can tell it has a lot of issues though like it ignores enemy pixels. There's multiple things we need to account for when deciding to move to a mine, distance, mine size, number of enemies in the way. Thinking about it the mine size is like the size of the reward for the action, the number of enemes and distance are the cost in time. I can combine them all into a single value by calculating reward/cost, converting the number of enemies to a time cost doesn't seem to have a clear answer. I guess I can calculate the pixels produced each second across all mines, divide the number of enemies by that and you have the seconds to produce that many pixels. Combining them all into a single value tells us how much advantage is gained by each move, we just need to find the moves with the highest advantage and take them. You can download the finished AI code here ChronosAI.js, I've called it Chronos since it all seems to be about making the best use of your time.
(2 months later) I ended up creating 16 total AI's, 9 of them are neural networks. I know sorry for the skip I won't be explaining it all here there's just too much to cover. The neural networks are very small(<100 neurons, <10000 connections), the network is run for every point and generates a probability given input data like nearby enemies, size of mine and distance to the point. I trained the neural networks on some of the AI's I programmed, and I 'evolved' some of the networks by running battles against each other and training on the 'best'(highest/fastest pixel score). The neural networks honestly out performed my expectations, training a small 50 neuron network on Chronos I was able to nearly match it. In the end I have a spectrum of AI's ranging from incredibly easy(DoofusNN) to impossibly hard(Chronos).
Here is a Youtube video showing each AI's behaviour through a timelapse:
The Game
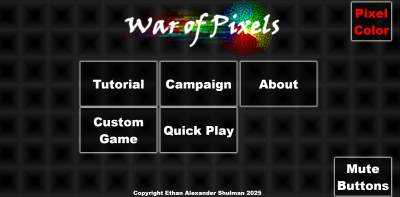
I've finished the game but there is just too much to explain in detail here. I added a main menu and in game UI using HTML/CSS, I made some songs for background audio using LMMS as well as sounds for the UI buttons. I finished the map generation there is 3 map sizes small, medium and large each with different shapes. I started with a custom game mode where you can choose all the game options, map size, map seed, AI options to play anyway you want. From there I made a campaign with 100 levels and a tutorial that walks you through the game. There is a quickplay mode that randomly generates a game for you using your previous game stats, it auto manages AI difficulty. Below you can see an image of the finished main menu.
Here is a YouTube video showing finished gameplay:
Play the game on Xaloez or Play the game on Itch
Download the completed source code.
Here is a YouTube video showing finished gameplay:
Play the game on Xaloez or Play the game on Itch
Download the completed source code.
Thanks for Reading! If you have any questions feel free to reach out to me at xaloezcontact@gmail.com.